Opalis 6.3: Automating Hyper-V Cluster Patching using the Configuration Manager IP (Part 2)
In Part 1 of this article, I began to talk about the process of maintaining Hyper-V Clusters. The process of "draining" a host (moving guest VM's off to another cluster node) was accomplished using a PowerShell script. The next steps include assigning updates and then monitoring the updates through the process of installation.
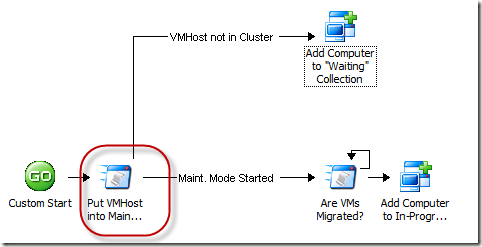
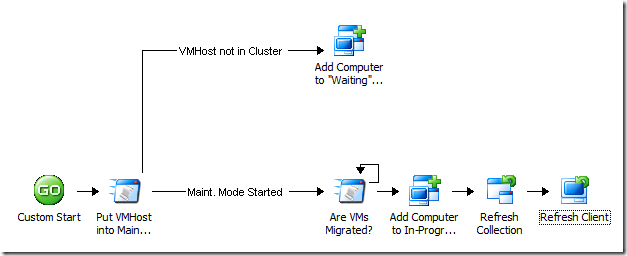
Just to refresh your memory, we're just about at the step shown here (remember that this policy was actually triggered by another one):
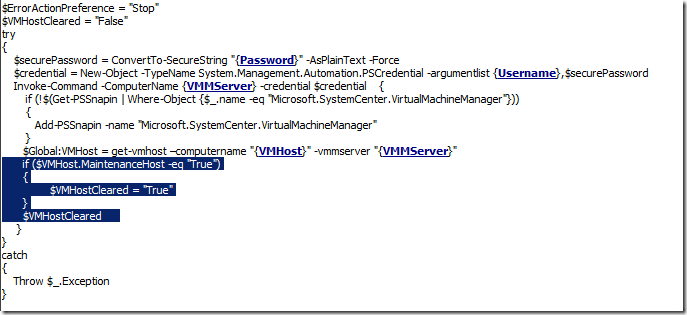
Remember that my script returned a value for the "HostCluster" property, and if it was blank, the link conditions would branch the workflow in two directions. If the value was blank (the host is not in a cluster), we'd drop the computer into a "Waiting" bucket (collection) and require more manual steps there. Otherwise, we can continue on to patch the node. The next step is to wait and verify that the quests have all been migrated off the cluster node. We do this with another PowerShell script. The easiest thing to do, now that we've figured out the whole 32-bit/64-bit PowerShell issue, is to cut and paste my previous script in there and then modify the part I need to change. Here's the script – The highlighted part is what's changed:
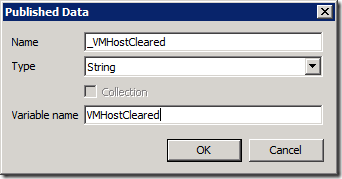
Basically, I'm checking the "MaintenanceHost" property on the VMHost object. If it's true, then the host is in maintenance mode. In the Run .NET Script activity, I add a Published Data item for this property:
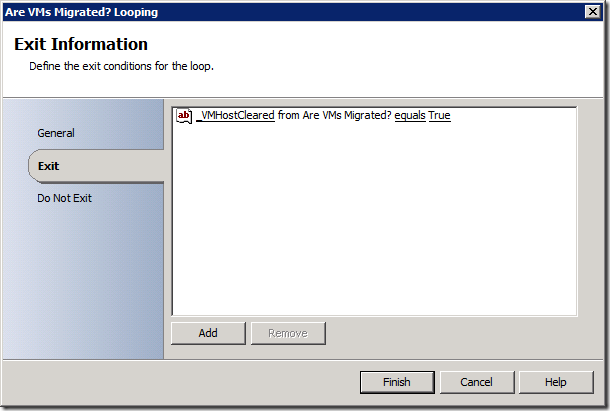
Now I can use this to check the value before I exit the activity. If the property comes back false, then I just loop on this activity until it returns True:
Now that my VM Host is in maintenance mode, I start the process of applying the patches. I have a predetermined collection name that I use for in-progress patching called (what else?) "In Progress". This collection already has a software deployment package (containing my required updates) assigned to it, so any computer placed in the collection will automatically get the updates and install them. Of course, depending on the collection refresh cycle and the target computer's software deployment and evaluation cycle, the time it takes for the computer to actually start doing what you want it to could be days. That's why we'll speed up the process here with a couple of actions from the ConfigMgr IP.
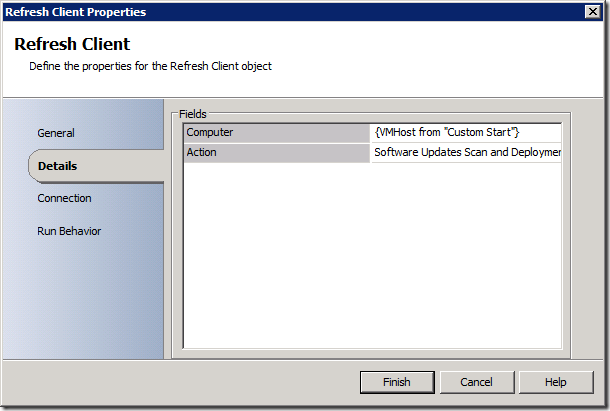
So what I've done is add a "Refresh Collection" activity to make sure that the membership of the collection is updated, then I added a "Refresh Client" activity with these settings:
This will actually go out to the client and "poke" the ConfigMgr agent and request it to perform two actions: the "Software Updates Scan Cycle" and the "Software Updates Deployment Evaluation Cycle". The first will use the Windows Update Agent to perform a scan of all updates installed versus the WSUS database to determine applicability and installation status. The second will compare that result to the update deployments assigned to the computer to see if any updates are available (in the deployment packages) that should be installed. If there are, the installation process begins.
One important note – since we're kind of "forcing" the installation of these updates at a specific time because this is a cluster, we'll need to make sure that the deployment package / deployment template does not enforce using maintenance windows and that the server can be rebooted at will in order to complete the update process. Not allowing updates will cause your patching process to stop and wait for a maintenance window, which kind of defeats the purpose of doing it this way ![]()
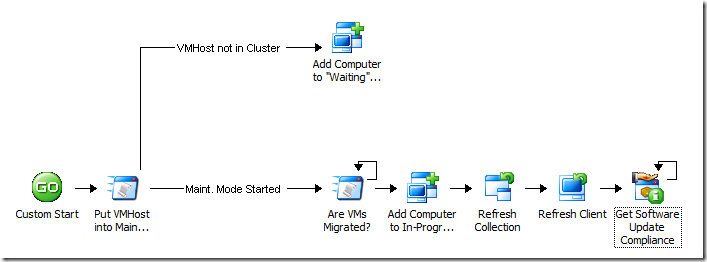
Once patches start to get applied, we need to determine where we are in the process, so we can know when it's actually complete. That's where the "Get Software Update Compliance" activity comes into play:
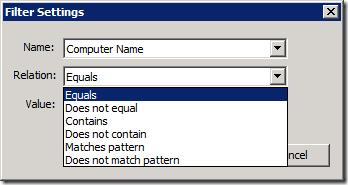
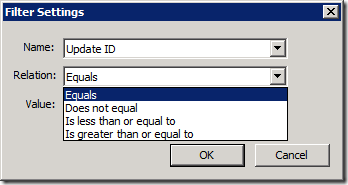
This is also a good time to talk about the Get Software Update Compliance activity, how it works, what you'd use it for (and what you wouldn't use it for). The activity accepts two "filter" inputs – one for a computer name and one for an update ID. Here are the different types of criteria relationships you can specify:
Using this activity, you can select a set of computers and a set of updates for which to return status. We wanted to get some more criteria in there, like collections, update lists, deployment package IDs, but we didn't have time in this release. Using the activity as it is, we can get status for a wide range of things, so it's still flexible. In reference to Gary Hay's comment in my last post, I will show you how to scope the status back to just the updates deployed in this workflow, but I will get to that in a minute.
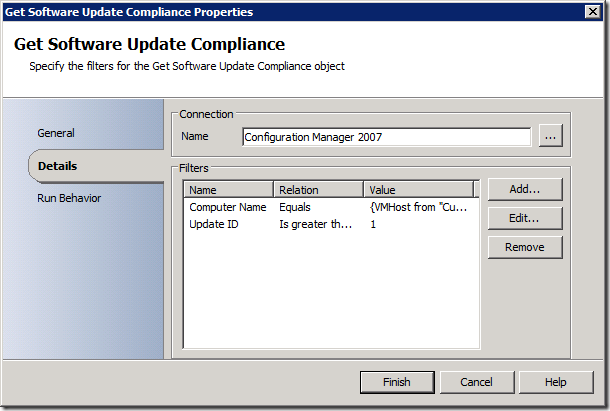
One way to think of how to use this activity in a "wide brush" approach is to make the assumption that if updates are available in a deployment package, then I will assume they need to be deployed to all my servers if they are deemed to be applicable. In other words, if I put them in a deployment package, I have approved them for deployment. If they are applicable on a server, they should be installed. The Get SU Compliance activity will return status back only for those updates where the client (1) knows about the update via scan/evaluation and (2) is going to install it. So I could do something like this:
…which says "show me status for this computer for ALL updates applicable to it". As I said, this is a "wide brush" approach. However, since the activity will not show any status for updates the computer will not be required to install, and we should assume that the computer was up to date on patches before we assigned the new ones to it, the result really should be only the updates we assigned in this workflow. In reality, if a previous update somehow got uninstalled and it's still assigned, then it would show up here as well. This is actually a better story than just checking the updates in the current workflow because if you ignore all other updates, you could be missing out on an error or otherwise missing update from a previous install.
Ok, back to Gary's question – how to *make sure* that the updates being checked for status are only the ones from this workflow? Well, that's a bit tricky because we didn't actually assign the updates as part of the workflow – we only assigned the collection. The Deployment Package was already assigned. However, we can infer the list of updates by querying the collection and its assignments. In other words…we would:
- Look up the collection ID
- Get the list of assigned Software Updates Packages for the collection
- Get the list of assigned update list(s) for the SU packages
- Get the status of the updates in the update lists for the given computer
Of course, we can skip a lot of that pain if we have an update list that contains all of the updates associated with this workflow. For simplicity, let's assume we already have that, and I'll show you a way to generate compliance status for that. The quickest way I know is to use ConfigMgr's built-in views within SQL and write a query using those views. Rummaging around the DB I quickly came up with this query:
 SELECT uas.[AssignmentID]
      ,uas.[ResourceID]
      ,rsys.Name0
      ,coll.CollectionID
      ,[IsCompliant]
      ,[ComplianceTime]
      ,[LastComplianceMessageID]
      ,[LastComplianceMessageTime]
      ,[LastEvaluationMessageID]
      ,[LastEvaluationErrorID]
      ,[LastEvaluationErrorCode]
      ,[LastEvaluationMessageTime]
  FROM [SMS_C07].[dbo].[v_UpdateAssignmentStatus] uas
  Join SMS_C07.dbo.v_R_System rsys on rsys.ResourceID = uas.ResourceID
  JOIN SMS_C07.dbo.v_CIAssignmentTargetedCollections coll on coll.AssignmentID = uas.AssignmentID
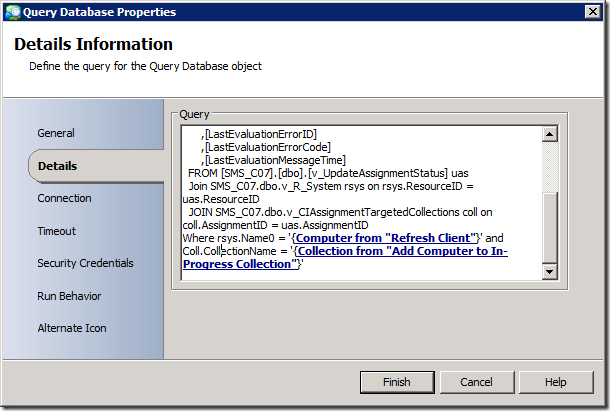
  Where rsys.Name0 = 'my-computer' and coll.CollectionName = 'In Progress'
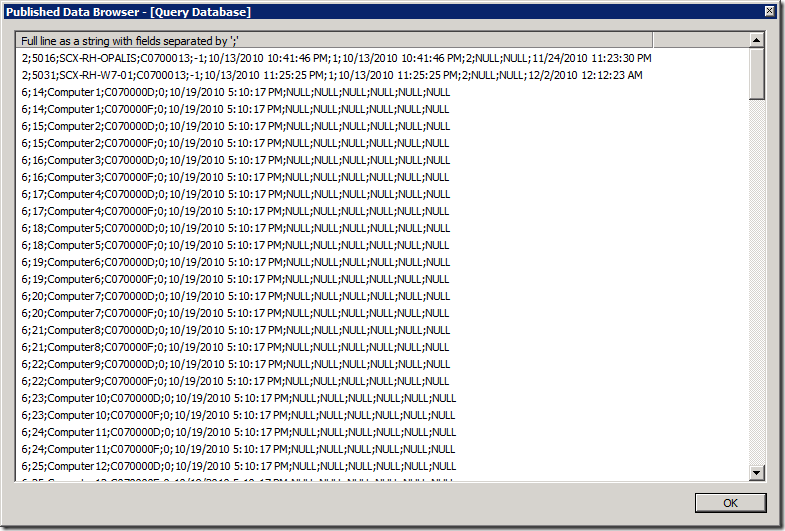
If I If I plug this in to a "Query Database" object in the workflow, I can get status back and parse it. It comes back as multi-value data, with each value being a semi-colon (";") delimited string. Note: Be sure to check out the article on running the Query Database activity on a 64-bit OS here: https://blogs.technet.com/b/opalis/archive/2010/11/19/using-the-query-database-object-on-64-bit-windows-server.aspx)
Here's some sample data I got back:
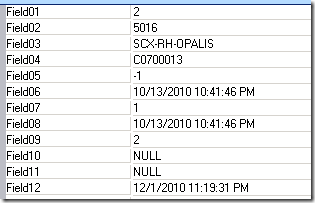
You can fine-tune the query to pull back as little or as much info as you want – you just have to parse it. To make it easy, I would strongly recommend using the Data Manipulation IP available on CodePlex. You'll then get output looking like this:
No to "personalize" this query for my particular workflow, I plug in the Published Data values for the computer name and the collection name like this:
Ok, so enough about getting back status. Now you need to do something based on the status. This articles, long enough, so I think I'll tackle that in Part 3 of this article up next.
