Recreating a DB without permanently deleting it from Exchange
The situation has come up for me that a Exchange 2010 database has grown larger than needed or expected and an Offline
Exchange Defrag with Eseutil isn’t a good option.Steps:
1. Move the mailboxes currently residing in the DB to other DBs or a temporarily created DB.
a. Make sure you move all the mailboxes. You can use the Exchange Management Console or PowerShell.
b. Get-mailbox –Database <DBNAME> | Get-MailboxStatistics | FT Displayname,DisconnectReason


c. Look for mailboxes that have a blank value for DisconnectReason. These are active mailboxes and still need to be moved before continuing.
d. If this Database is a member of a Database Availability Group (DAG) “remove” all the passive copies.
e. If using circular logging the last passive copy cannot be removed until circular logging is disabled on the active “Mounted” DB. Disabling circular logging will require the active DB be dismounted and remounted to take effect.
f. Using PowerShell execute the following commands:
g. Set-MailboxDatabase –Identity <DBNAME> -CircularLoggingEnabled:$False
h. Dismount-Database – Identity <DBNAME>
i. Mount-Database –Identity <DBNAME>

2. Remove the last passive database copy.
3. Dismount the active DB copy again.
4. Dismount-Database – Identity <DBNAME>

5. At this point you’ll need to delete all the existing database (.EDB) and log files that are connected to the database on all the servers that have copies of the files with Windows Explorer.
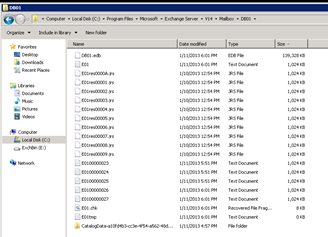
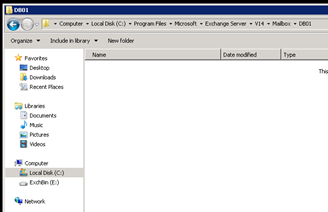
6. Remember if your .LOG files are stored separately to delete those as well.
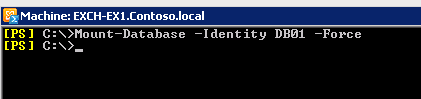
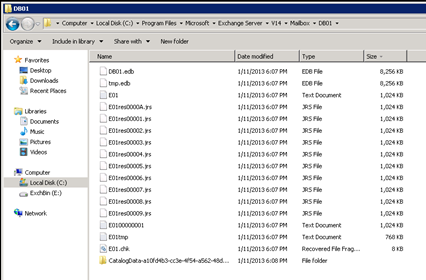
7. Now you need to force mount the database on the server that you just dismounted in the previous step. This force mount will force Exchange to recreate a blank .EDB file for the database.
8. Mount-Database –Identity <DBNAME> -Force
9. If this database is part of a DAG there are a few steps remaining.
10. Create passive copies
11. Execute the following command as many times as needed to create the needed amount of copies.
12. Make sure each time the command is executed for a single DB that the ActivationPreference number is incremented.
13. Add-MailboxDataBaseCopy –Identity <DBNAME> -MailboxServer <TARGETSERVER> -ActivationPreference <#> -SeedingPostponed

14. Since database seeding was postponed in the last command we now need to begin seeding.
15. The source server can be any of the copies but in the end for the seeding to finish it will ultimately connect to the actively mounted copy.
16. You may have to suspend replication for the passive copies before running the update-mailboxdatabasecopy cmdlet.
17. Update-MailboxDatabaseCopy –Identity <DBNAME\HOSTNAME> -DeleteExistingFiles –Network <REPLICATIONNETWORK> -SourceServer <SOURCEDBSERVER>

18. Once all copies are created and if circular logging was enabled before it’s now a good time to re-enable circular logging.
19. Set-MailboxDatabase –Identity <DBNAME> -CircularLoggingEnalbed:$True

Hope this helps and hit me with feedback
Regards,
Robert