Managing Your Web Applications by Applying User Policies and Custom Permission Levels
If you are trying to control how certain users or groups can manipulate objects within your Web Application, creating custom permission levels are the way to do it. There a couple of different ways to accomplish this, but the most flexible is to create a custom Permission Policy and in this case, I am limiting a specific user and a security group from creating subsites. Creating subsites impacts the obvious new site creation on a collaboration site, but also can limit creating subsites under a My site, a great governance tool if you have limited space or need to apply other rules to the process.
Let’s start the process.
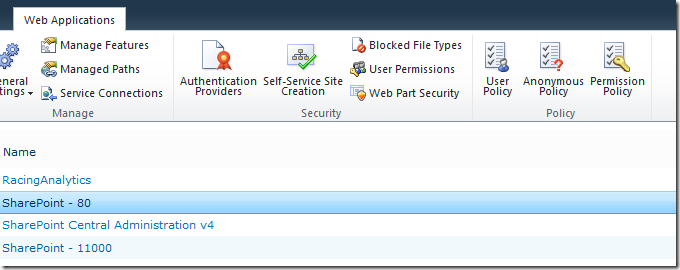
First, go to Central Administration, then Application Management > Web Applications > Manage Web Applications. Below is a list of my Web Applications that I can apply to my policy. Select “User Policy” for the appropriate Web App (I selected “SharePoint – 80”).
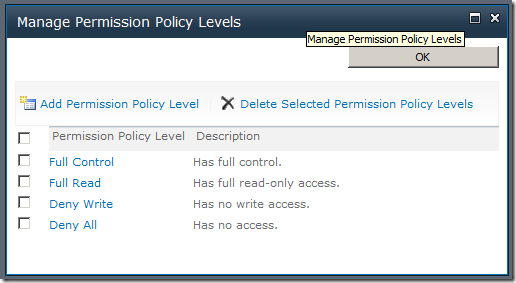
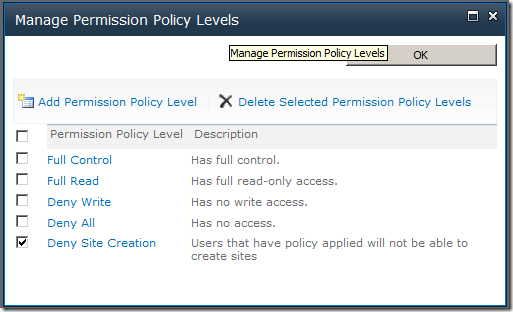
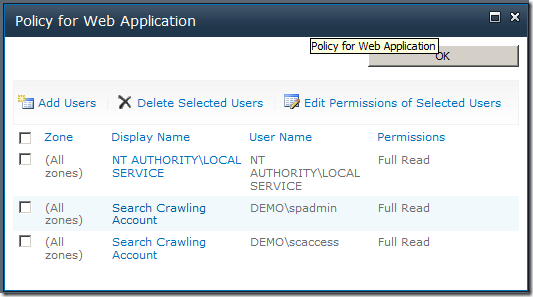
Before I start, the default users and permissions are listed below, but I want to add my own permission so that I can limit the creation of sub-sites for a specific user (and security group). I select the “Permission Policy” button, then I get this screen to create my own permission policy. Click “Add Permission Policy Level” to start the process.
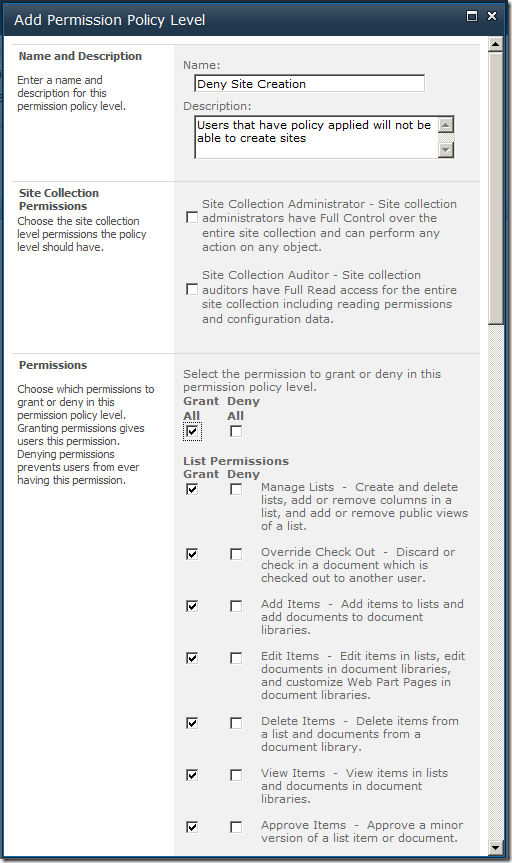
The first screen I see to build my permission level asks me to create a Name and Description. The “Site Collection Administrator” and “Site Collection Auditor” provides a method to elevate permissions and let the user or group identified in this policy. As the creator of the permission level, there’s a granular control over what level of access I will let this group have in this web application.
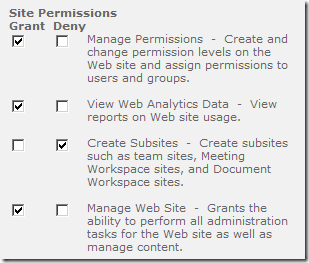
After I select “Grant All”, I can go back in and change individual permissions. In this case, I have denied the ability to create subsites. This is a helpful permission level if you have users that constantly delete sites.
After I’ve finished, my permission level is available to be utilized in my web application.
When I finish, I am going back to click “Add Users”…
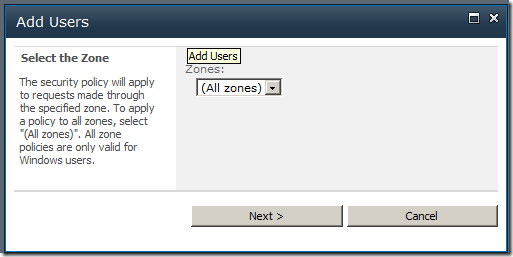
This screen will pop-up and now you can select a zone to restrict. In this case, I’m going to restrict all zones within this web application.
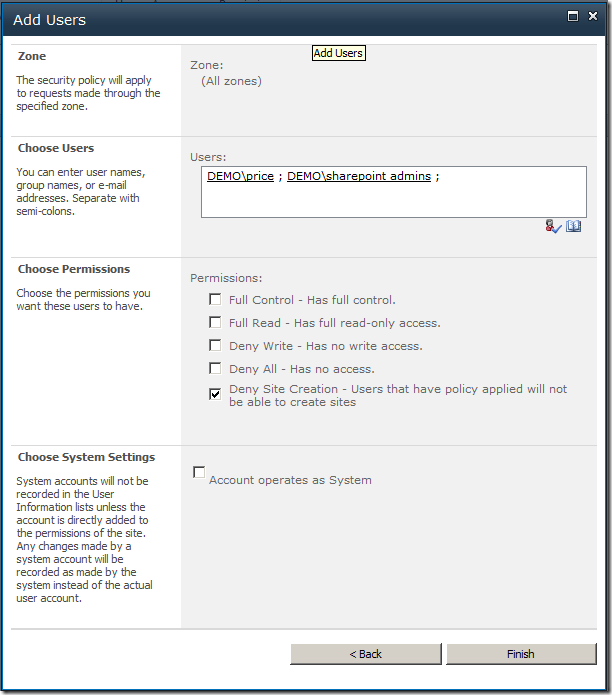
Then select a user (DEMO\price) and a Security Group (DEMO\SharePoint Admins) and apply the “Deny Site Creation” permission level. Notice that I could apply the “Account operates as System” bit and that will record actions as a system account versus an individual account.
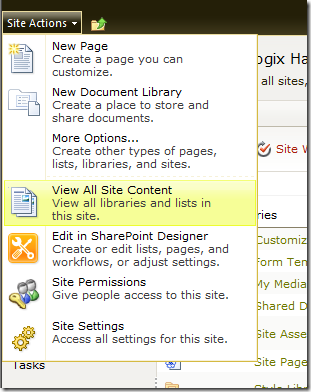
I finish this and now I am ready to test by logging in a “DEMO\price” and then try to create a site by clicking “Site Actions”. If you notice the option is trimmed so that the user does not see the option.
I had to test this a couple times to make sure the permission level was acting as expected, but it works as advertised and now I can apply different policies for Lists, Libraries, Site Management, Personal View or Alert actions.
That’s pretty much it and I like this way to manage my policies instead of applying them across my entire web application because I can go back in and add another user or uncheck a box, or create a new permission level that only applies to another set of users.
