Azure Custom Vision in action
Azure platform offers many ready-to-use cognitive services, allows you easily enrich your applications with innovative features.
In this article we will see how to use the Custom Vision service. We will train a model to learn how to recognize some types of coats. We will then test this model and finally we will see how to use it within an application.
Prerequisite
The part about the notebook can be done, among others, with:
- Microsoft Azure Notebooks service
- The "Data Science" virtual machine available from Azure portal
In this article, we will use the "Data Science" virtual machine
Creating "Data Science" virtual machine
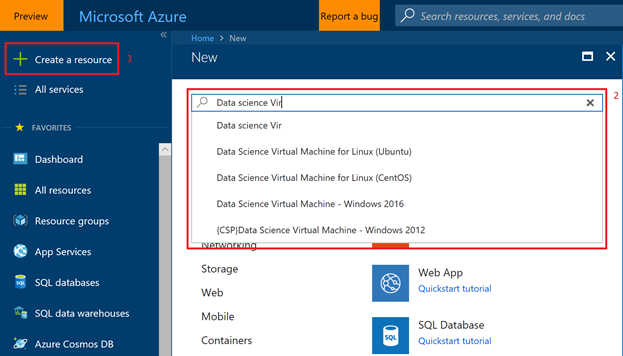
- Connect to the Azure Portal: https://portal.azure.com
- Click on " Create a resource », and then search for the virtual machine "Data Science"
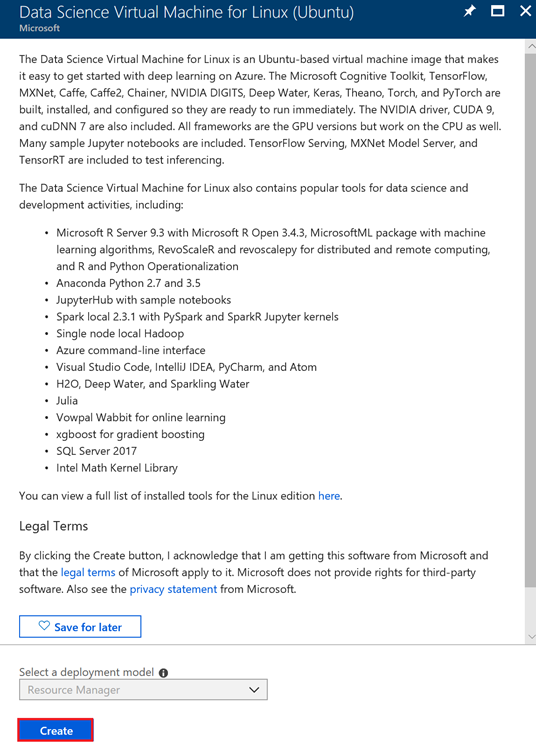
Select " Data Science Virtual Machine for Linux (Ubuntu) ». Then Click on the button "Create"
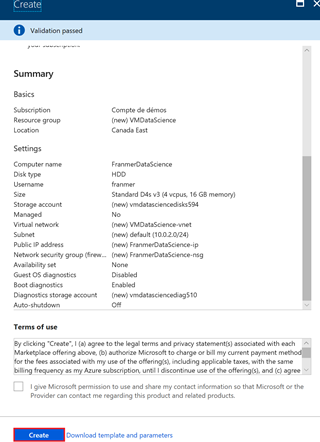
Fill in the virtual machine creation form
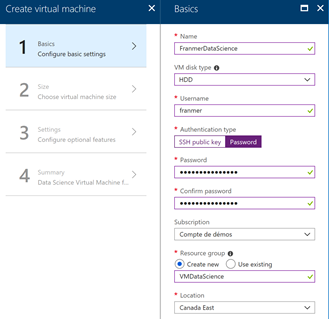
At the end of the process click on the "Create" button
The virtual machine is now created. We will connect on its Jupyter server. The connection is an URL type:
https://< Your_VM_IPAddress >: 8000
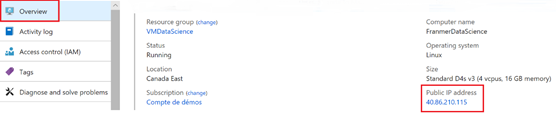
In our case, this address will be:
The virtual machine IP address can be found on the Azure portal:
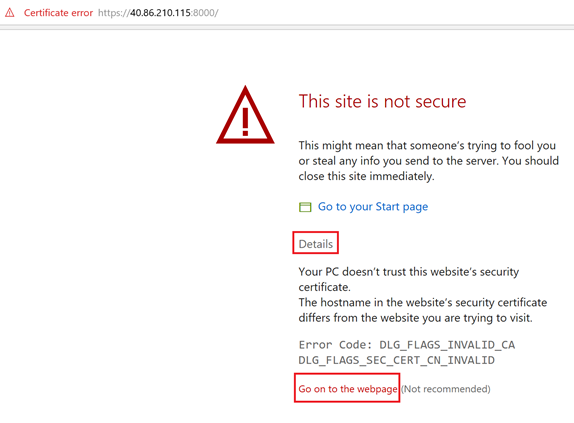
The following window may appear. Click on " Details, then Go on the Web page »
In the login window, enter the name and password you have used when creating the virtual machine:
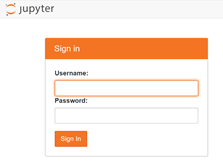
After a few seconds you must land on the Jupyter server home page.
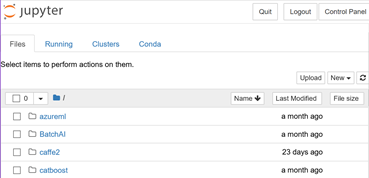
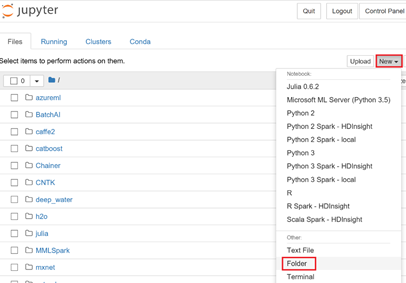
We will create a folder to facilitate our work. Click on "New" then "Folder"
Check the box to the left of the newly created folder (the folder is named « Untitled Folder »), then click the button « Rename » on top of the page.

Rename the folder and then click on the "Rename" button

Creating the Notebook
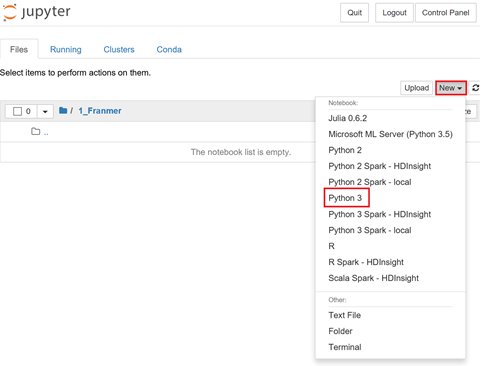
Enter the previously created folder. Click on the button "New" then "Python 3"
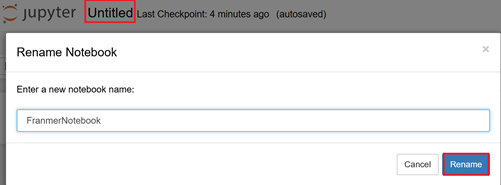
Once the Notebook created, click "Untitled" and give it a name. Click on "Rename"
Download pictures
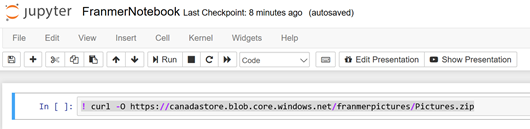
In the first cell of the Notebook, copy the code below to recover the training and tests images
! curl-O https://canadastore.blob.core.windows.net/franmerpictures/Pictures.zip
Then click « run » on the toolbar (or use the combination key "Shift Enter" or "Ctrl Enter" ). For the rest of the article, after copying the code in the cells, think well to execute the code.
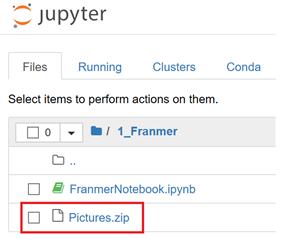
If everything goes well, the Pictures.zip file must appear in your folder
We will now unzip the file. Use the command below in a new cell:
! unzip Pictures.zip
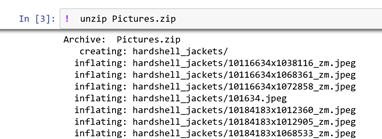
Attention: star between the hooks, means the code is still running. Wait until the star disappears.

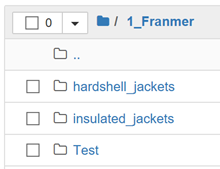
Three new files had to appear:
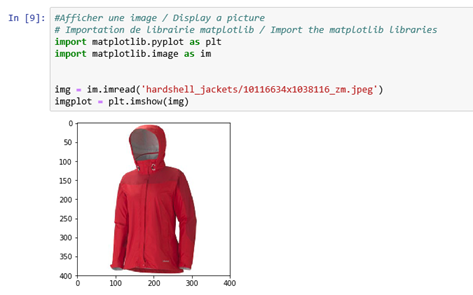
displaying an image
We will display an image and see some basic functions to deal with pictures. We will use « Matplotlib » library. « Matplotlib » documentation can be found here: https://matplotlib.org/.
Copy the code below to a new cell:
#Afficher une image / Display a picture
# Importation de librairie matplotlib / Import the matplotlib libraries
import matplotlib.pyplot as plt
import matplotlib.image as im
img = im.imread('hardshell_jackets/10116634x1038116_zm.jpeg')
imgplot = plt.imshow(img)
In the first run, the following message may appear. This will not affect the outcome.

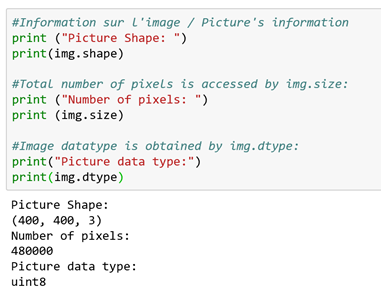
Retrieve picture information
An image is intrinsically an array of values of pixels (Picture Element) and It is important to be able to recover picture information, in order to use them with object recognition algorithms. Below is a sample code for retrieving certain information. Copy and paste it in a new cell. Don't forget to run the code.
#Information sur l'image / Picture's information
print ("Picture Shape: ")
print(img.shape)
#Total number of pixels is accessed by img.size:
print ("Number of pixels: ")
print (img.size)
#Image datatype is obtained by img.dtype:
print("Picture data type:")
print(img.dtype)
Integration with the "Custom Vision" cognitive service
Microsoft offers many Cognitive Services. The complete list is available through the following link: https://azure.microsoft.com/en-us/services/cognitive-services/directory/
In addition, these services may be called as a web service to return the prediction results.
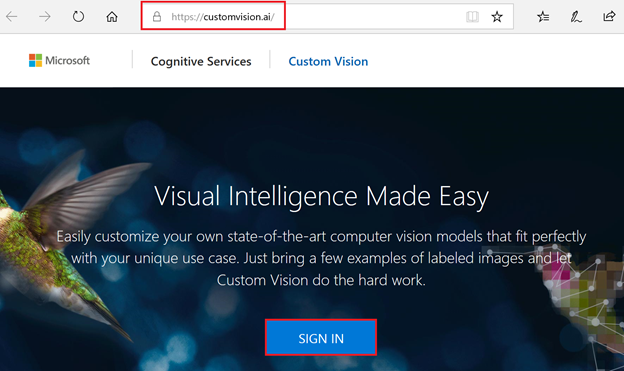
In this example, we will use the service "Custom Vision" . This service is available through the following link: https://customvision.ai/.
But before, we still have small preparations to do in our Notebook.
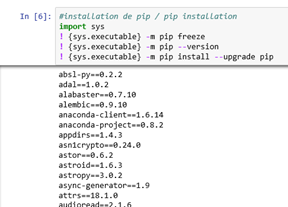
Installing the Custom Vision SDK
As a first step, we will check the presence of "Pip" and its update. "Pip" is a tool for installing Python packages. In a new cell of the Notebook, copy the following code:
#installation de pip / pip installation
import sys
! {sys.executable} -m pip freeze
! {sys.executable} -m pip --version
! {sys.executable} -m pip install --upgrade pip
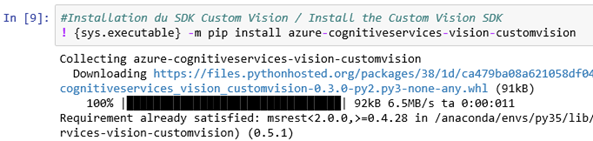
From your notebook, enter the following command: (So we use " Pip "To Install the Package Of the "Custom Vision" cognitive service) :
#Installation du SDK Custom Vision / Install the Custom Vision SDK
! {sys.executable} -m pip install azure-cognitiveservices-vision-customvision
Configuring the "Custom Vision" cognitive service
We will now create a "Custom Vision" service via the following link:
Click on " Sign In »
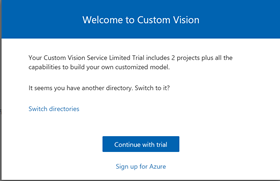
Can choose to click on "Continue with trial" or click on "Sign Up for Azure". For our example, we will choose " Continue with trial » :
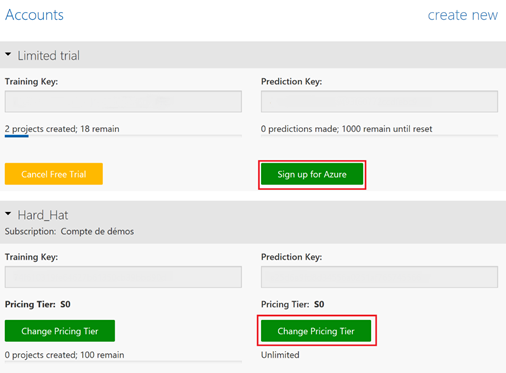
Once the service is created, retrieve the information from your service by clicking the gear in the top right of the window

Then recover the values of your keys
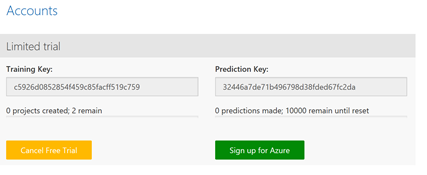
Return to your Jupyter notebook to assign the key values to the variables:
# Assignez les clefs de votre service "Custom Vision" aux variables / Assign your Custom service keys to variables
training_key = 'c5926d0852854f459c85facff519c759'
prediction_key = '32446a7de71b496798d38fded67fc2da'

Creating a Custom Vision project
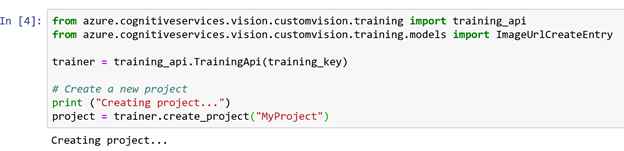
From the notebook, we will create a project in the "Custom Vision" cognitive service. In a new cell, copy the code below and run it:
from azure.cognitiveservices.vision.customvision.training import training_api
from azure.cognitiveservices.vision.customvision.training.models import ImageUrlCreateEntry
trainer = training_api.TrainingApi(training_key)
# Create a new project
print ("Creating project...")
project = trainer.create_project("MyProject")
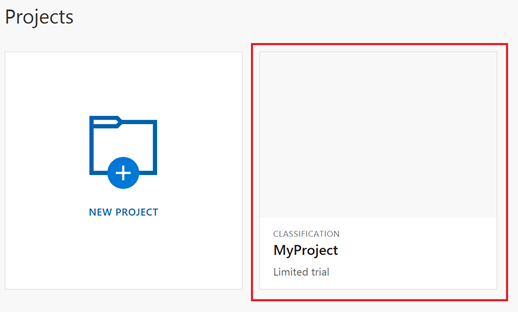
If you return to the "Custom Vison" service web page, you will find a new project:
Labels creation
Before adding images to the service, we will create our first labels to identify the images.
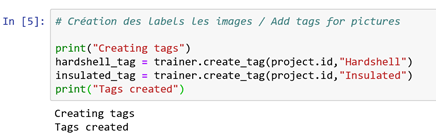
Add the following code to a new cell and run the code:
# Création des labels les images / Add tags for pictures
print("Creating tags")
hardshell_tag = trainer.create_tag(project.id,"Hardshell")
insulated_tag = trainer.create_tag(project.id,"Insulated")
print("Tags created")
Loading Images
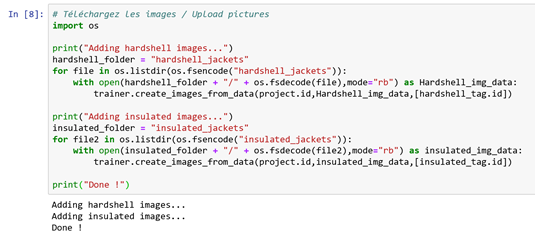
Now let's add the images in our custom vision project and add the labels at the same time. Copy and run the code below in a new cell:
# Téléchargez les images / Upload pictures
import os
print("Adding hardshell images...")
hardshell_folder = "jacket_images/hardshell_jackets"
for file in os.listdir(os.fsencode("jacket_images/hardshell_jackets")):
with open(hardshell_folder + "/" + os.fsdecode(file),mode="rb") as Hardshell_img_data:
trainer.create_images_from_data(project.id,Hardshell_img_data,[hardshell_tag.id])
print("Adding insulated images...")
insulated_folder = "jacket_images/insulated_jackets"
for file2 in os.listdir(os.fsencode("jacket_images/insulated_jackets")):
with open(insulated_folder + "/" + os.fsdecode(file2),mode="rb") as insulated_img_data:
trainer.create_images_from_data(project.id,insulated_img_data,[insulated_tag.id])
print("Done !")
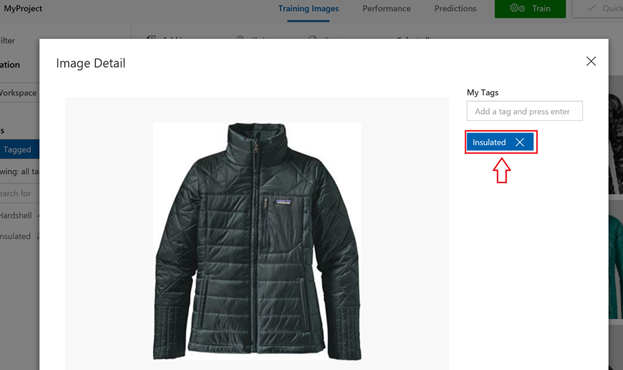
Check the presence of the images in the web interface of the cognitive service, and check that the images have the right label.
Training of the project
After adding images and set the different labels, we can now train a model for identifying our images.
In a new cell, copy and run the code below:
#Entrainement du projet / Train the project
import time
print("Training....")
iteration = trainer.train_project(project.id)
print (iteration.status)
while (iteration.status != "Completed"):
iteration = trainer.get_iteration(project.id,iteration.id)
print("Training status: " + iteration.status)
time.sleep(1)
# Set this iteration of the project as the default.
trainer.update_iteration(project.id,iteration.id,is_default=True)
print("Done!")

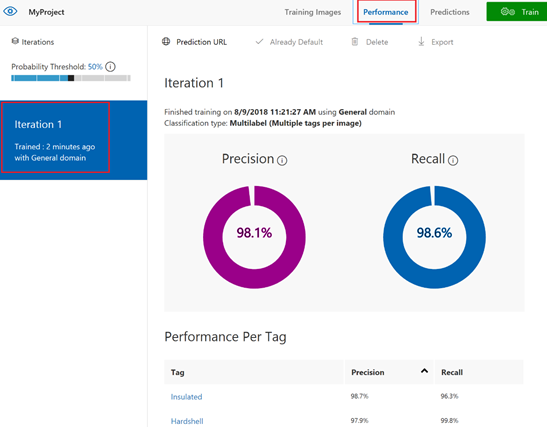
If we check in the web interface of the cognitive service, a first iteration of our model was created.
Test the model
Now that the model has been trained, we will test it with another set of images
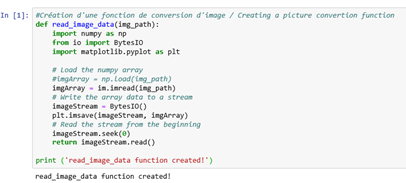
As a first step, we will create a function to convert images and send a data value to the cognitive service endpoint.
To do this conversion, we will create a function. Copy the code below into a new cell:
def read_image_data(img_path):
import numpy as np
from io import BytesIO
import matplotlib.pyplot as plt
# Load the numpy array
#imgArray = np.load(img_path)
imgArray = im.imread(img_path)
# Write the array data to a stream
imageStream = BytesIO()
plt.imsave(imageStream, imgArray)
# Read the stream from the beginning
imageStream.seek(0)
return imageStream.read()
print ('read_image_data function created!')
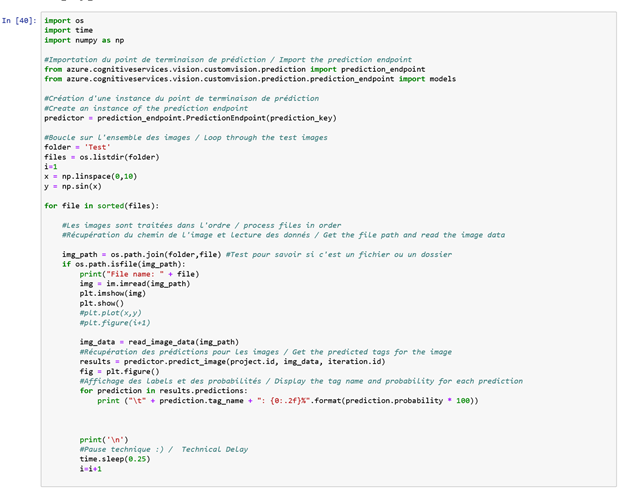
We will use the model we have trained to make predictions on test images. We will also use the function created previously to convert the images before sending them to the model.
In a new cell in your Notebook, copy the code below:
import os
import time
import numpy as np
#Importation du point de terminaison de prédiction / Import the prediction endpoint
from azure.cognitiveservices.vision.customvision.prediction import prediction_endpoint
from azure.cognitiveservices.vision.customvision.prediction.prediction_endpoint import models
#Création d'une instance du point de terminaison de prédiction
#Create an instance of the prediction endpoint
predictor = prediction_endpoint.PredictionEndpoint(prediction_key)
#Boucle sur l'ensemble des images / Loop through the test images
folder = 'Test'
files = os.listdir(folder)
i=1
x = np.linspace(0,10)
y = np.sin(x)
for file in sorted(files):
#Les images sont traitées dans l'ordre / process files in order
#Récupération du chemin de l'image et lecture des données / Get the file path and read the image data
img_path = os.path.join(folder,file) #Test pour savoir si c'est un fichier ou un dossier
if os.path.isfile(img_path):
print("File name: " + file)
img = im.imread(img_path)
plt.imshow(img)
plt.show()
#plt.plot(x,y)
#plt.figure(i+1)
img_data = read_image_data(img_path)
#Récupération des prédictions pour les images / Get the predicted tags for the image
results = predictor.predict_image(project.id, img_data, iteration.id)
fig = plt.figure()
#Affichage des labels et des probabilités / Display the tag name and probability for each prediction
for prediction in results.predictions:
print ("\t" + prediction.tag_name + ": {0:.2f}%".format(prediction.probability * 100))
print('\n')
#Pause technique :) / Technical Delay
time.sleep(0.25)
i=i+1
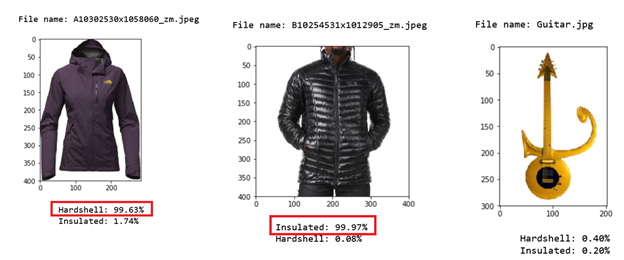
Our model returns predictions to try to identify whether the scanned images are coats or not, and if so, what kind of coat is it. Below a sample of prediction results
Using the cognitive service with Visual Studio
Now that our model is ready, It could be interesting to use the service API to Integrate predictions in an application. Below is a quick illustration of integrating the cognitive service into an application.
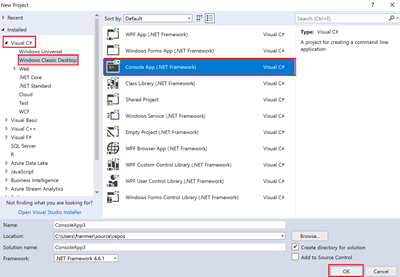
Start Visual Studio 2017 and create a "Console App"project.
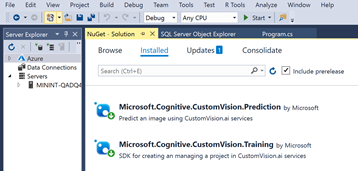
Once the project created, go to « Tools / NuGet Package Manager / Manage NuGet Packages for Solution... " and add the Custom Vision Packages as illustrated below:

Add the 2 following packages:
Then in the file "Program.cs" add the code below. Replace the keys by those of your cognitive service project
using Microsoft.Cognitive.CustomVision.Prediction;
using Microsoft.Cognitive.CustomVision.Training;
using Microsoft.Cognitive.CustomVision.Training.Models;
using System;
using System.Collections.Generic;
using System.IO;
using System.Linq;
using System.Threading;
namespace myTutorialCustomVision
{
class
Program
{
//private static MemoryStream testImage;
static
void Main(string[] args)
{
var projectID = "<YourProjectID>";
var trainingKey = "<YourTrainingKey>";
var predictionKey = "<YourPredictionKey>";
string imagesPath = @"..\..\..\myTutorialCustomVision\Images";
string[] imageFiles = Directory.GetFiles(imagesPath, "*.jpg");
TrainingApi trainingApi = new TrainingApi() { ApiKey = trainingKey };
var project = trainingApi.GetProjects();
Guid myGuid = project[0].Id;
var iterations = trainingApi.GetIterations(Guid.Parse(projectID));
var validIterations = iterations.Where(iter => iter.Status == "Completed");
var lastIterationTrained = validIterations.OrderBy(iter => iter.LastModified).Last();
Iteration lastIteration = trainingApi.GetIteration(myGuid, lastIterationTrained.Id);
lastIteration.IsDefault = true;
trainingApi.UpdateIteration(myGuid, lastIteration.Id, lastIteration);
foreach (var image in imageFiles)
{
FileStream fileStream = new FileStream(image, FileMode.Open, FileAccess.Read);
PredictionEndpoint endpoint = new PredictionEndpoint() { ApiKey = predictionKey };
Console.WriteLine("Making a prediction for picture: " + Path.GetFileName(image));
var result = endpoint.PredictImage(myGuid, fileStream);
foreach (var c in result.Predictions)
{
Console.WriteLine($"\t{c.Tag}: {c.Probability:P1}");
}
}
Console.ReadKey();
}
}
}
Test of the application
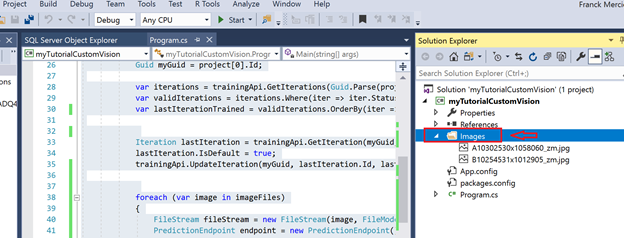
To test the application and the predictions, I added a folder images in the "Solution Explorer" and I have copied 2 images in this folder
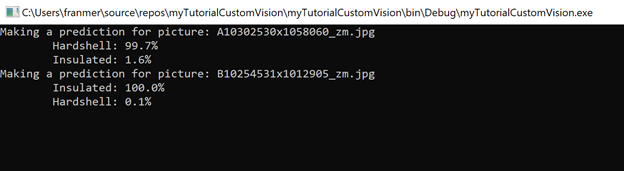
Result
The application will return, for each image, a prediction for each Labels.
You may get the error " Operation returned an invalid status code '429' » If you are testing with a large number of images. Often this error comes from the fact that your service is in trial version or undersized. To correct the problem, just change the "Pricing tier" on the Custom Vision Web page, in the "Account" section.