Fun with DISM (or How to Prepare a Clean Install of Windows 8/8.1 for your Surface Pro Device)
This guide is meant to be a quick, fun guide to injecting drivers into a Windows image using a Surface Pro as an example target machine. I was unable to find a concise source of information on how to do this without getting an in depth lesson on the Windows ADK, or DISM, so I figured I'd introduce myself with a guide that I hope many will find helpful.
Before we get started, please make sure you are complying with the license agreement associated with the version of Windows you choose to work with.
What You'll Need
- Windows ADK (Assessment and Deployment Kit) - https://go.microsoft.com/fwlink/p/?LinkID=293840
- Windows ISO file - if you are a VL customer, grab this from the Volume Licensing Service Center (VLSC) or contact your procurement department
- Technician Computer (can be a virtual machine!) - where you will install the ADK and perform the actions listed below.
- Target Computer - in this case a Surface Pro 2
- Drivers for Target Computer - Since I'm using a Surface Pro 2, the firmware and driver pack can be found here: https://www.microsoft.com/en-us/download/details.aspx?id=38826
The one tool we'll need to use in the Windows ADK is DISM. We're not going to dive into any of the other components of the Windows ADK quite yet.
Getting Started
After installing the Windows ADK on your technician computer, you'll need to mount your Windows installation media and copy the install.wim file to a local directory. Windows 8+ has built in ISO mounting, though if you're on Windows 7, feel free to use your favorite ISO mounter (Virtual CloneDrive, Daemon Tools, etc.). In this example, the Windows 8.1 ISO is mounted to F:\. The install.wim file is located in the sources directory, F:\sources in this case. Copy the install.wim file to your local hard drive, I'm using C:\images to store the ISO, drivers, and install.wim file.
The next step is identifying which version of Windows we would like to inject the drivers into. We're using a Windows 8.1 ISO, which contains two versions of Windows 8.1: Windows 8.1 and Windows 8.1 Pro. We'll be working with the Windows 8.1 Pro image.
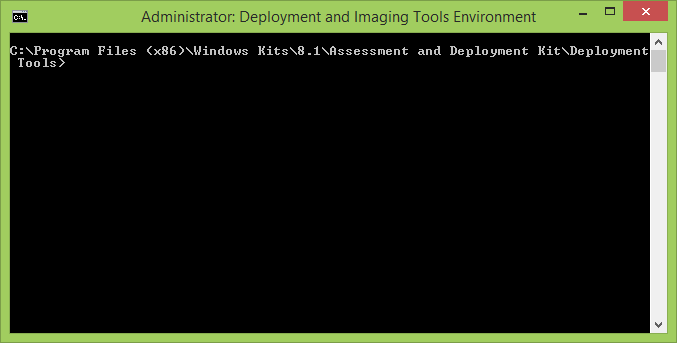
On your Technician Computer, open the Deployment and Imaging Tools Environment as Administrator. To do this in Windows 8.1, press the Windows key, type deployment, select the Deployment and Imaging Tools Environment icon, and either right click and select "Run as Administrator" or press Ctrl+Shift+Enter. You should see a window that resembles the following:
We must first identify which edition of Windows we wish to work with. The following command will tell us more information about our install.wim file:
> Dism /Get-WimInfo /WimFile:C:\images\install.wim

In our case, we want to use Windows 8.1 Pro, Index 1.
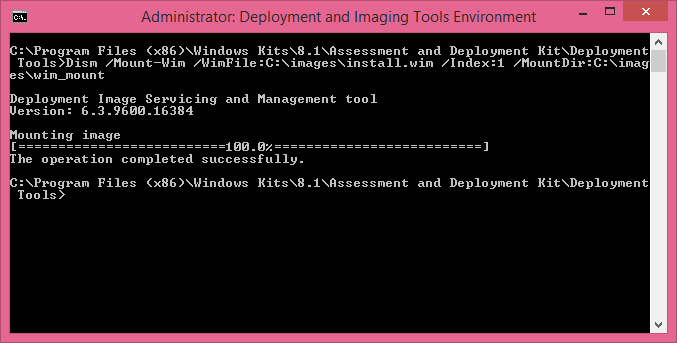
In order to work with the WIM file, you'll have to mount it. Create a new directory for mounting your WIM, I'm using C:\images\wim_mount. Mount your WIM file with the following command:
> Dism /Mount-Wim /WimFile:C:\images\install.wim /Index:1 /MountDir:C:\images\wim_mount
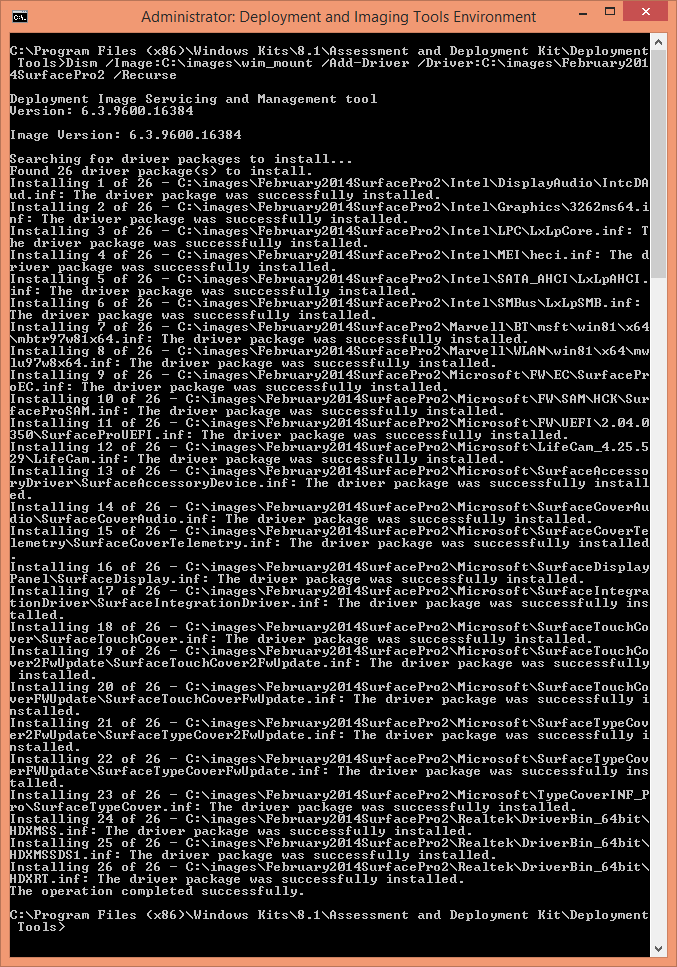
Next, you'll have to collect the hardware specific drivers you wish to inject into your Windows installation. The Surface Pro Firmware and Driver pack includes everything we need and can be downloaded at: https://www.microsoft.com/en-us/download/details.aspx?id=38826. I extracted the driver package to C:\images\February2014SurfacePro2.
To inject drivers into the WIM file, use the following command:
> Dism /Image:C:\images\wim_mount /Add-Driver /Driver:C:\images\February2014SurfacePro2 /Recurse
You can also add individual drivers by omitting the /Recurse option in the command above and pointing it to a specific .INF file as such:
> Dism /Image:C:\images\wim_mount /Add-Driver /Driver:C:\images\February2014SurfacePro2/testDriver.INF
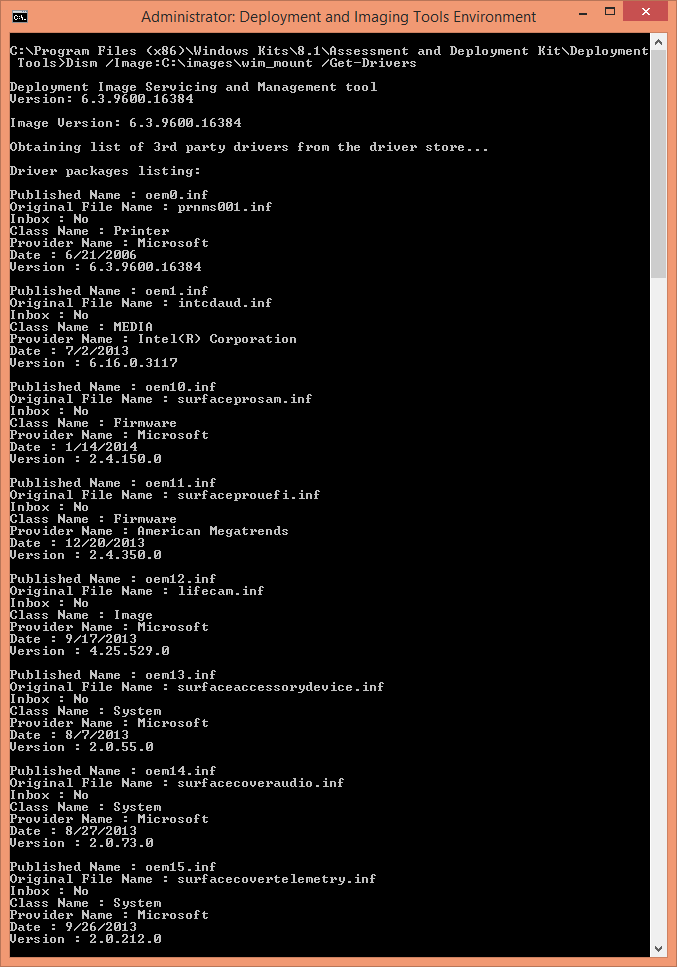
I always think it's a good practice to confirm that the drivers were added. Use the following command to get information on 3rd party drivers added:
> Dism /Image:C:\images\wim_mount /Get-Drivers
Once you've successfully injected the drivers and confirmed they're there, you must now commit the changes and unmount the WIM. The following command does exactly that:
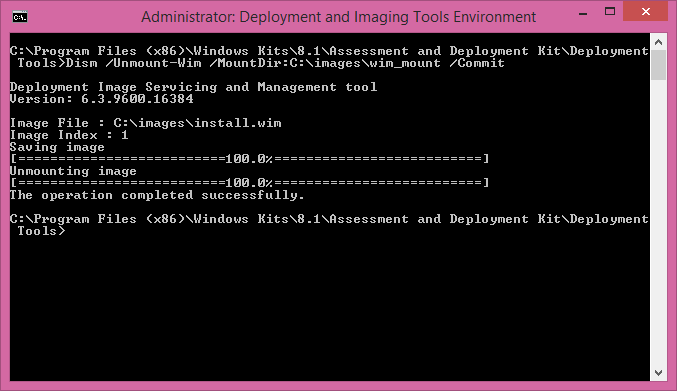
> Dism /Unmount-Wim /MountDir:C:\images\wim_mount /Commit
Congratulations, you're (mostly) done! Now that you have a nice, new, driver-injected WIM file, you have options for deployment. You can throw it at your SCCM/WDS server and deploy it that way, or you could put it on a flash drive. I'll write up a quick blog post about preparing USB media for Windows installation as a follow up to this.
TL;DR
For those who don't want to read the wall of text above, here's the "too long; didn't read" version:
- Install Windows ADK
- Copy install.wim from sources directory of Windows installation media to local directory
- Open up Deployment and Imaging Tools Environment (DITE) as Administrator and enter the following italicized commands within the DITE window
- Figure out which edition of Windows you'd like to utilize and make note of the Index: Dism /Get-WimInfo /WimFile:C:\images\install.wim
- Mount the WIM file: Dism /Mount-Wim /WimFile:C:\images\install.wim /Index:1 /MountDir:C:\images\wim_mount_dir
- Extract drivers to local directory
- Inject drivers into offline WIM: Dism /Image:C:\wim_mount /Add-Driver /Driver:C:\images\drivers\ /Recurse
- Confirm drivers were added: Dism /Image:C:\images\wim_mount /Get-Drivers
- Save changes to WIM and unmount: Dism /Unmount-Wim /MountDir:C:\images\wim_mount /Commit
- Add WIM to SCCM/WDS or prepare USB drive with new WIM file
- Install and enjoy
Additional Resources
Windows ADK Documentation - https://technet.microsoft.com/en-us/library/hh824947.aspx
Windows ADK Download - https://go.microsoft.com/fwlink/p/?LinkID=293840
Add and Remove Drivers Offline (DISM) - https://technet.microsoft.com/en-us/library/dd744355(v=WS.10).aspx
Surface Pro Firmware and Driver pack - https://www.microsoft.com/en-us/download/details.aspx?id=38826