Demonstration of E-Mail Receipt and E-Mail Archival by a SharePoint Library.
[This post comes to us courtesy Rituraj Choudhary]
Windows SharePoint Services version 3 supports Libraries to be able to receive emails. However, by default it does not have this feature enabled in SBS 2008, as Exchange and WSSv3 are installed on the same box. In SBS 2008, it is enabled by configuring an email domain to be used by the SharePoint site. Exchange creates a foreign connector to take care of the mail routing.
In order to demonstrate, let us create a new SharePoint library:

We can specify whether this document library is capable of receiving emails here:

If we do not enable the Incoming E-Mails setting above, we can do it later as well. We can also follow these steps for the existing libraries. Here is the procedure. Open the Library in question. Go to Settings \ Document Library settings.
On the Customize page, select Incoming E-Mail settings:

Let us enable both of these options:
Incoming E-Mail: Allow this document library to receive e-mail? Yes. Type a distinctive email address.
E-Mail Message: Save original e-mail? Yes. This will save the email as well.
Click OK to save the settings.

For users to be able to send e-mails to the SharePoint libraries, we need to create a Mail Enabled Contact in the Exchange Management Shell (you can also do this from the console). The following command creates the mail enabled contact:
[PS] C:\Windows\System32> New-MailContact -Name TestLib -ExternalEmailAddress Testlib@companyweb
Name Alias RecipientType
---- ----- -------------
TestLib TestLib MailContact
Let us wait for a few minutes for the Offline Address List to be updated in Outlook before attempting to send e-mail.
Now, let us send an email with an attachment to test the receipt of the emails in the Library:

The email should then go to the local C:\inetpub\mailroot\drop directory:

You should now see the e-mail dropping in to the library:

If we click on the attachment, it gives the option to save or open the file:

If we click on the email, we can see the email contents:

Archiving Emails:
You can also enable E-Mail Archival as per the steps above. Let us configure it on the Shared Documents in the Archived E-Mails site under the Companyweb.

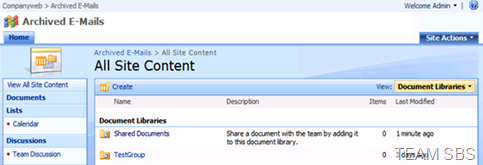
Open the Shared Documents in the Archived E-Mails site, and configure the Settings > Document Library Settings > Incoming e-mail settings as:

Create the mail enabled contact on the Exchange Management Shell as:
New-MailContact -Name OldEmails -ExternalEmailAddress OldEmails@companyweb
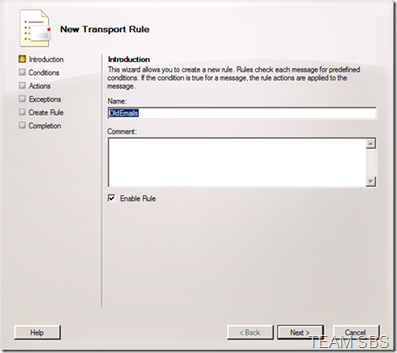
Create a new Transport Rule under Organization Configuration in the Exchange Management Console:

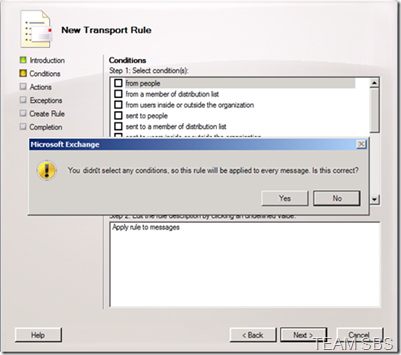
Don’t choose any of the options on the conditions page, it should prompt that the rule will be applied to every message. Select Yes.
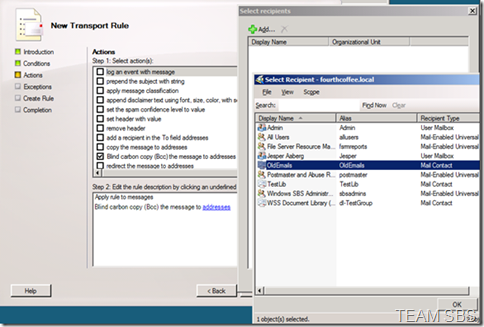
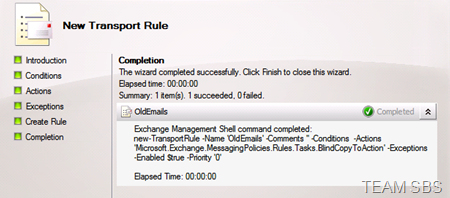
Under the Actions, select “Blind carbon copy (Bcc) the message to addresses”. Click addresses to select the Recipient as OldEmails mail-enabled contact we just created. Hit OK twice.
Keep clicking Next until you Finish.
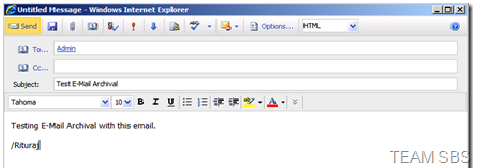
Send an email to any one for testing.
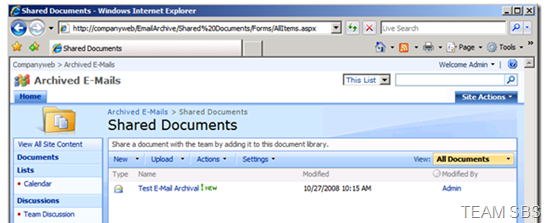
A blind carbon copy should drop to the Companyweb > Archived E-Mails > Shared Documents as below:
Additionally, we can also view the Email Details (From, To fields etc) by selecting Edit Properties of the item.
Please also note that if we create an e-mail enabled Security Group using Windows SBS Console, there is an option of archiving e-mail messages to the group on the Windows SharePoint Services Web site (Companyweb > Archived E-Mails) on the server. This facility is not available for Distribution Groups.
Reference: